So here's a useful thing that I haven't been able to find much information on: making your own static grass!
Well. A substitute anyway.
It is not actually static grass since it doesn't stand on end due to static electricity the way the genuine article does. But it does produce quite a realistic look-- waaaayyy better than painted-then-drybrushed sand. And the best part? It costs under 3 bucks (USD) for as much as you could care for.
It
is a little labor intensive as you'll see in the how-to, but for those of you who, like me, have more time than anything else, it might be worth it.
*UPDATE*: Since posting this tutorial, I've refined my method somewhat. You can see the updated version with some more helpful tips
here.
How to Make Your Own Grass Flock:
Materials:
-Gardening Twine (about 2 USD from the local hardware store for a small spool-- which is all you'll need.)
-Scissors (Make sure they're comfortable!)
-Crappy acrylic paints (I used some tiny tubes of Basic I had lying around.)
-'Pledge Acrylic Floor Polish with Future Shine' for thinning (optional.)
-Paper towels or an old rag.
-A small jar or other container in which to dye and collect your new grass.
Procedure:
1) Use your crappy paints in your jar to mix up a color of green for your grass. As you can see, my first green was rather teal, but don't worry too much if your color looks a little unnatural. The color of acrylic paints are usually brighter when they're wet than when they're dry, but more importantly, gardening twine is made up of brown natural fibers, so the color of the twine will wind up darkening the color of the grass and giving it an earthier feel.
When you have a color that you like, thin the paints down until they are the consistency of milk. I use a mixture of four parts water to one part future floor polish ('magic wash') for this, but just plain water will also do.
 |
| My color. I mixed the straight basic green with cadmium yellow and a little red. The ratio was about 4:2:1. |
2) Next, cut yourself a nice section of twine. I went with 4 six inch sections to start with. You'll then need to separate the twine into individual 'strands'. This is easy, just unwind the braid.
 |
| As you can see, 'individual strands' does not mean 'fibers' so don't panic. This is not where things get difficult. |
3) Now, wrap your strands into a loose nest around your fingers...
 |
| My fingers look like little birds! |
...and then submerge them in the thinned paint. Use an old brush or other pokey type device to make sure that the twine is thoroughly soaked.
Let the twine sit in the paint for at least 20-30 minutes-- Long enough for the pigment to soak deep into the fibers, but not so long that it begins to dry.
4) Once that's done, spread out some newspaper or paper towels. Pick out your wet wad of twine and slap it on there.
 |
| Big ole wad o' green. |
Separate those strands again and spread them out on the newspaper so that they won't wind up sticking together too much. Then take another sheet of newspaper or paper towel and gently pat the top of your grass. You want to press down just hard enough to wick off a little excess moisture, but not so hard that the pigment runs back out of the twine. If you leave too much pigment in the twine, the fibers will stick together, but if you lose too much pigment, your grass will just be brown. Though if this happens, don't worry. Just dunk the twine back into the paint for another go. Also note that a few brown areas are okay-- they make for an excellent natural variation in the color of your grass.
Set these guys aside and let them dry completely. Go clean and dry your jar so it will be ready for the harvest. The strands should have a kind of 'crunchy' feel to them when you come back.
5) Now comes the most trying part: turning your 6" lengths of dyed twine into tiny tiny blades of grass for tiny creatures to stand on.
Once your strands of dyed twine are dry, hold them one at a time with one end over the mouth of the jar, and begin snipping with your scissors. As you clip the strands down into grass-sized chunks, the fibers should mostly separate and collect in the jar. You're aiming for blades of grass in the .5 to 2mm range, though it depends on your scale.
This can take a while. I suggest putting on a T.V. show or podcast to while away the time. I used
Doctor Who:
 |
| Don't know who painted this, but it's 'Fantastic.' |
This is why it's important to have comfortable scissors. The ones I used for this batch were junk and gave me calluses, so I ditched them and got myself a $2 pair with a rubberized grip. It went so much faster.
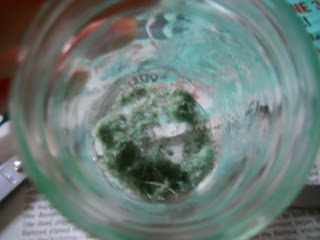 |
| The first trimmings! |
You should note that you won't get uniform lengths with this method, which for me is good-- I dislike the idea of my warriors dismembering each other on perfectly manicured lawns.
You should also note that despite your best efforts, there will be some longer fibers mixed in when your done. This is not so bad as A) they can be trimmed with scissors or picked off after the grass is applied to a base and B) these fibers cause the grass to gather in clumps in the jar. These clumps can then be taken in fingers at application time and gently squeezed and teased to produce an even sprinkling of tiny grass fibers.
Above is about half way through the trimming process. It yielded a decent amount of grass. But it was all the same color. The beauty of this method is that you can create whatever
blend of colors you want. So I went on to mix up a yellower green, a redder green, and a blacker green, dyed some more twine, and chopped it up too!
The result was a full half-jar of grass flock with natural color variation between shade and highlight, absolutely
bristling (*headslap*) with verisimilitude! And this method doesn't only apply for green grass either. Why not dark purple if you happen to be in the realms of chaos? Or perhaps a nice crimson if you plan on staging the time war on Galifrey?
Actually, if
Stardred ever comes out, I might use it to make red grass for a partially teraformed Martian setting. Might also make it my
Red Sand Black Moon setting, a la
Carmen's Fun Apocalypse Time.
So that's it! Not too bad, right? And nice and cheap, huh? Good! Here are some pics of what it looks like on the base of the tree I'm working on. (What's that? Another tutorial? Yes, provided the tea-leaf foliage works well.)
So until then, Peace!


